Ayurveda rose in popularity as a holistic medicine in the west for the past few decades. Alongside Ayurveda, rose the awareness of ghee as a super food. Ghee is made from butter, in this post we will learn How to make Ghee from Raw Milk butter.
First lets see what is all this buzz about Ghee. Ghee is full of fat-soluble vitamins and healthy fatty acids, and ghee benefits can range from building stronger bones to enhancing weight loss. Ghee has been used for thousands of years in India for cooking, Vedic religious ceremonies and healing. In fact, ghee mixed with honey and energized with mantras is the first food we give to newborns even before mother’s milk.
In Ayurveda, Ghee is called liquid gold because of its healing potency. I am not a health practitioner, but can say from my own life experience, that I take ghee to cleanse my body and improve digestion. Many years back I took medicated ghee to fall pregnant under an Ayurvedic doctor’s supervision. There are many benefits to adding ghee to your diet. Before we learn how to make ghee from raw milk, I will touch on the most important points.

HEALTH BENEFITS OF GHEE
1. RICH IN FAT SOLUBLE VITAMINS
Ghee can help boost your intake of vitamin A, vitamin E and vitamin K, all important nutrients that play a role in everything from maintaining healthy vision to keeping your skin glowing. Therefore, its worthwhile to add ghee to your diet daily.
2. LACTOSE AND CASEIN FREE
Since, we separate milk solids while cooking butter, ghee becomes lactose and casein free. Lactose and casein protein is often the cause for milk intolerance. As a result of separating these 2 elements from ghee my daughter who is lactose intolerant can actually take ghee without any problems.
3. CONTAINS CONJUGATED LINOLEIC ACID
Ghee is jam-packed with conjugated linoleic acid (CLA), a fatty acid that is associated with a long list of health benefits. CLA is higher in grass fed cow milk, so try to make ghee from grass fed butter.
4. GHEE IS HIGH ON BUTYRIC ACID
Butyrate, or butyric acid, is a short-chain fatty acid which plays a central role in gut health. Some studies have suggested that it may help support healthy insulin levels.
These are some of the main benefits of ghee. There is an arms length of benefits which I will not be dwelling upon. Scroll down to the end of the blog post for a list of links to support the above facts.
Lets now dive into how to make ghee from raw milk butter at home. It is that easy if you follow the steps below.
WAYS TO MAKE GHEE FROM RAW MILK BUTTER
Some time back I shared a post on how to make Homemade Butter from Raw Milk . The best ghee from the health and taste point of view is made from raw cow’s milk. There are 2 ways to make ghee.
The traditional way to make ghee would be to leave the milk solids alone while melting the butter and cooking ghee. The milk solids will eventually settle down and you can easily separate them by filtering them. This ghee will have a nutty flavor.
The second method is to remove the milk solids when they start to separate as the butter melts. The foam which forms are the milk solids. The texture of both the ghee will be similar, but personally I prefer the traditional method.
RAW MILK TO GHEE VIDEO TUTORIAL
INGREDIENTS & TOOLS NEEDED
- 500 grams Raw milk butter
- Heavy bottom pot
- Sieve
- Thin muslin cloth
- Sterilized glass jars
METHOD
Melt the Butter from Raw Milk in a heavy bottom pot on medium to low heat. (or you can also use store bought ) Don’t use a high flame because you can burn the butter and the ghee will smell burnt. Medium to low heat is preferable to get a nice flavor.
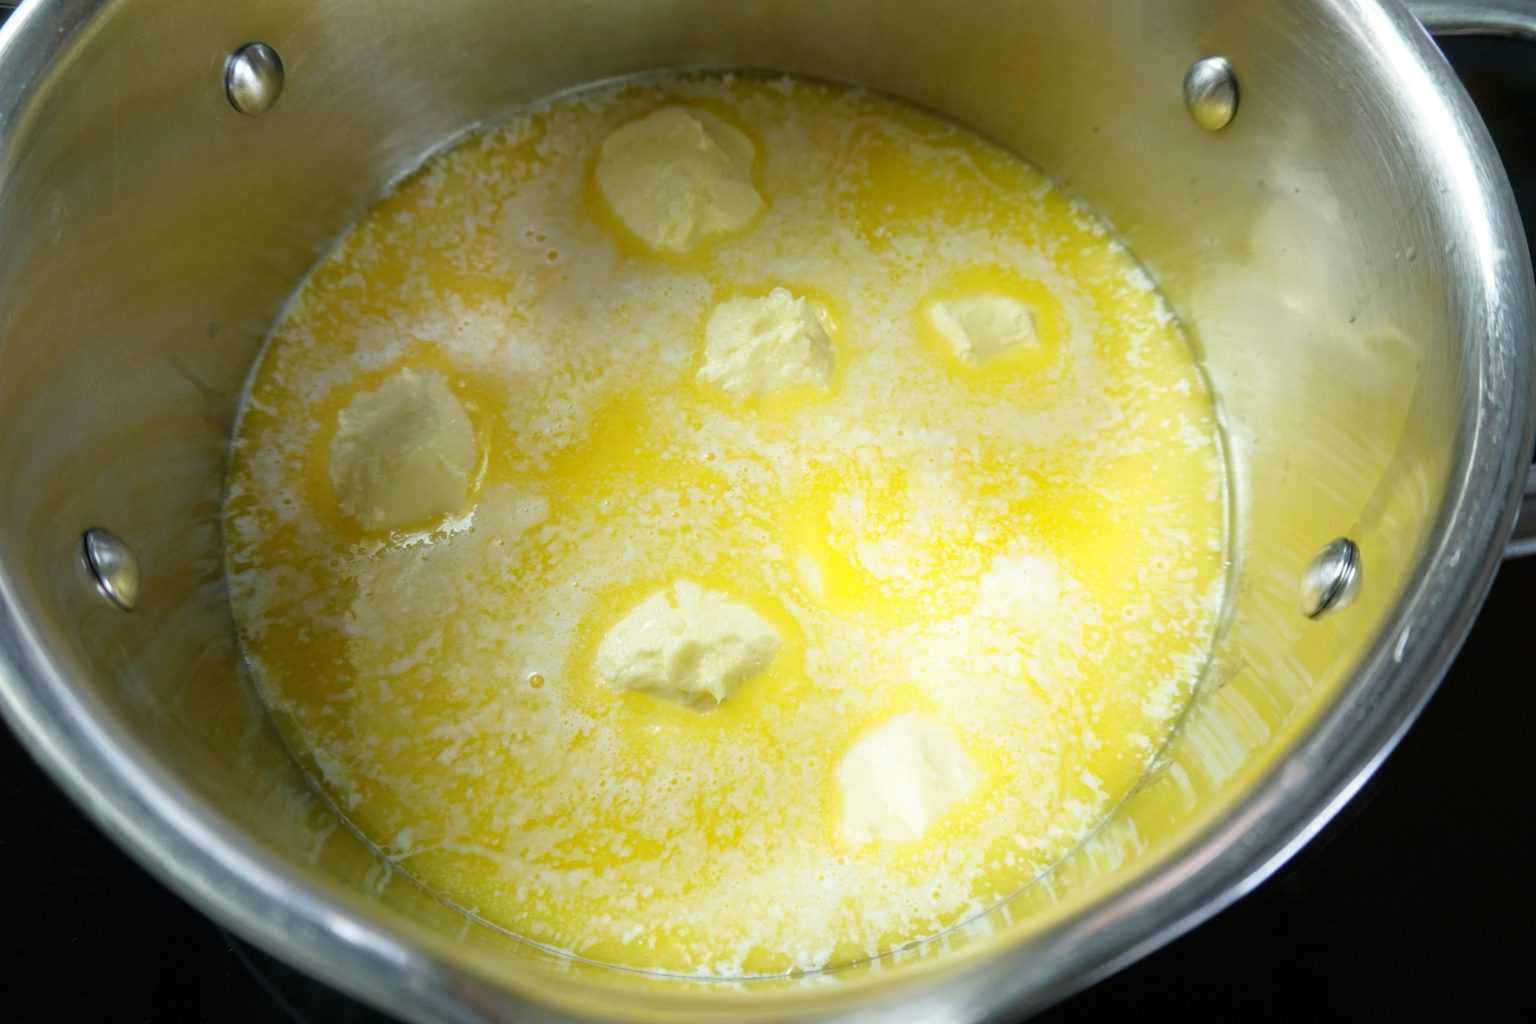
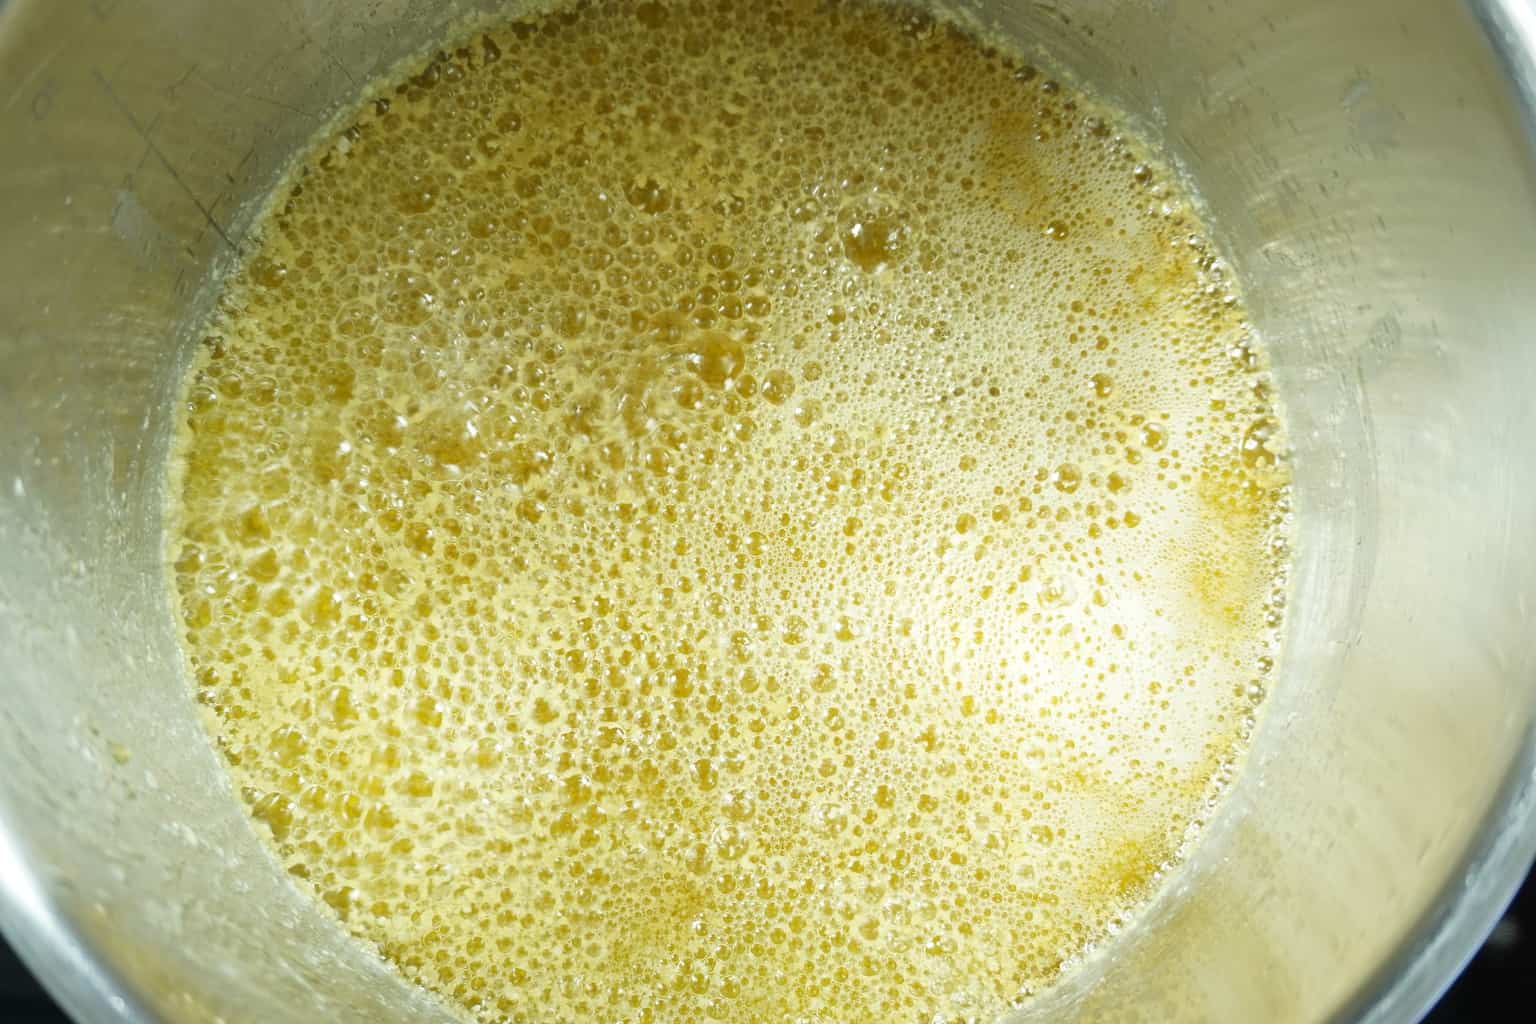
As the butter melts, you will see that the butter will start foaming once it starts to melt.
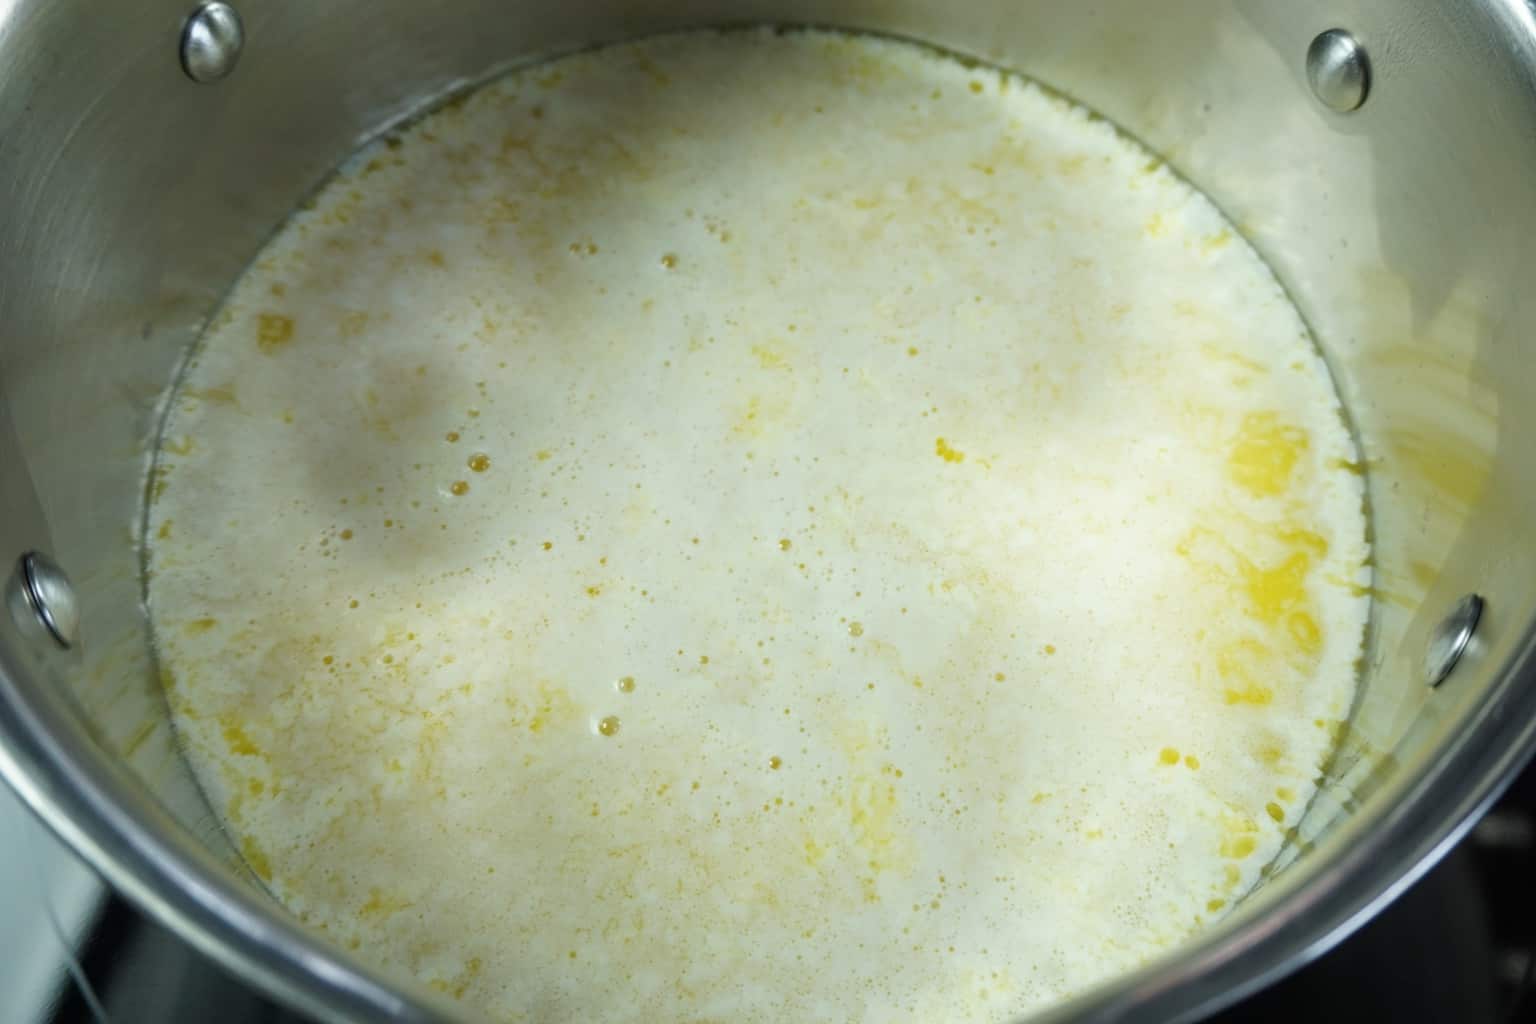
The above picture shows how the butter will look like after the butter has melted. The white foam are the milk solids. This is the first foaming stage. Continue heating in the same heat. The water in the butter will start evaporating as well. Be prepared for a few splashes and mess on your stove top.
Below you see the milk solids separating from the melting butter. If you are making ghee in the traditional way, leave the foam (milk solids) undisturbed. On the other hand if you want to scoop out the foam you can do so. Personally, for me this method is too much of a botheration, so I don’t do it.
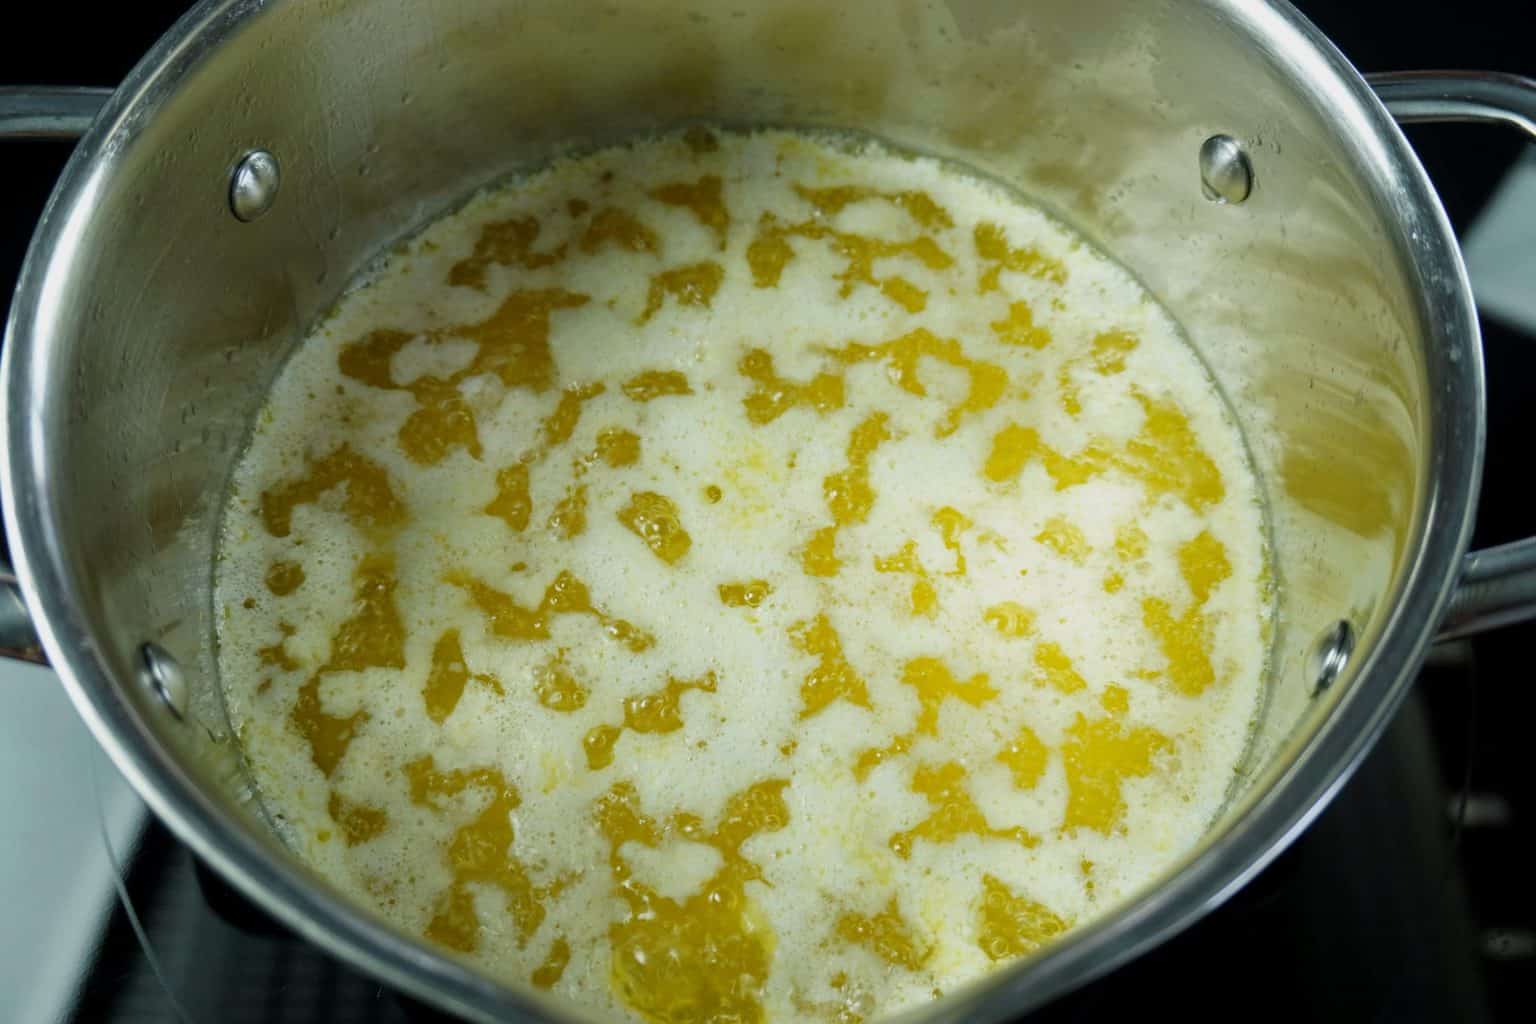
Continue heating and you will see the butter will start clarifying further. Once the milk solids start to settle down, the clarified butter undergoes a second foaming stage. The milk solids after settling down will start clarifying, the clarified butter will start to boil gently.
HOW DO YOU KNOW WHEN THE GHEE HAS BEEN DONE ?
When the butter has almost finished clarifying, larger bubbles will start to form. You will smell the nutty aroma of ghee soon. At this stage I usually add a couple of cloves for extra flavor, this is optional of course. You can see the cloves in the picture below.
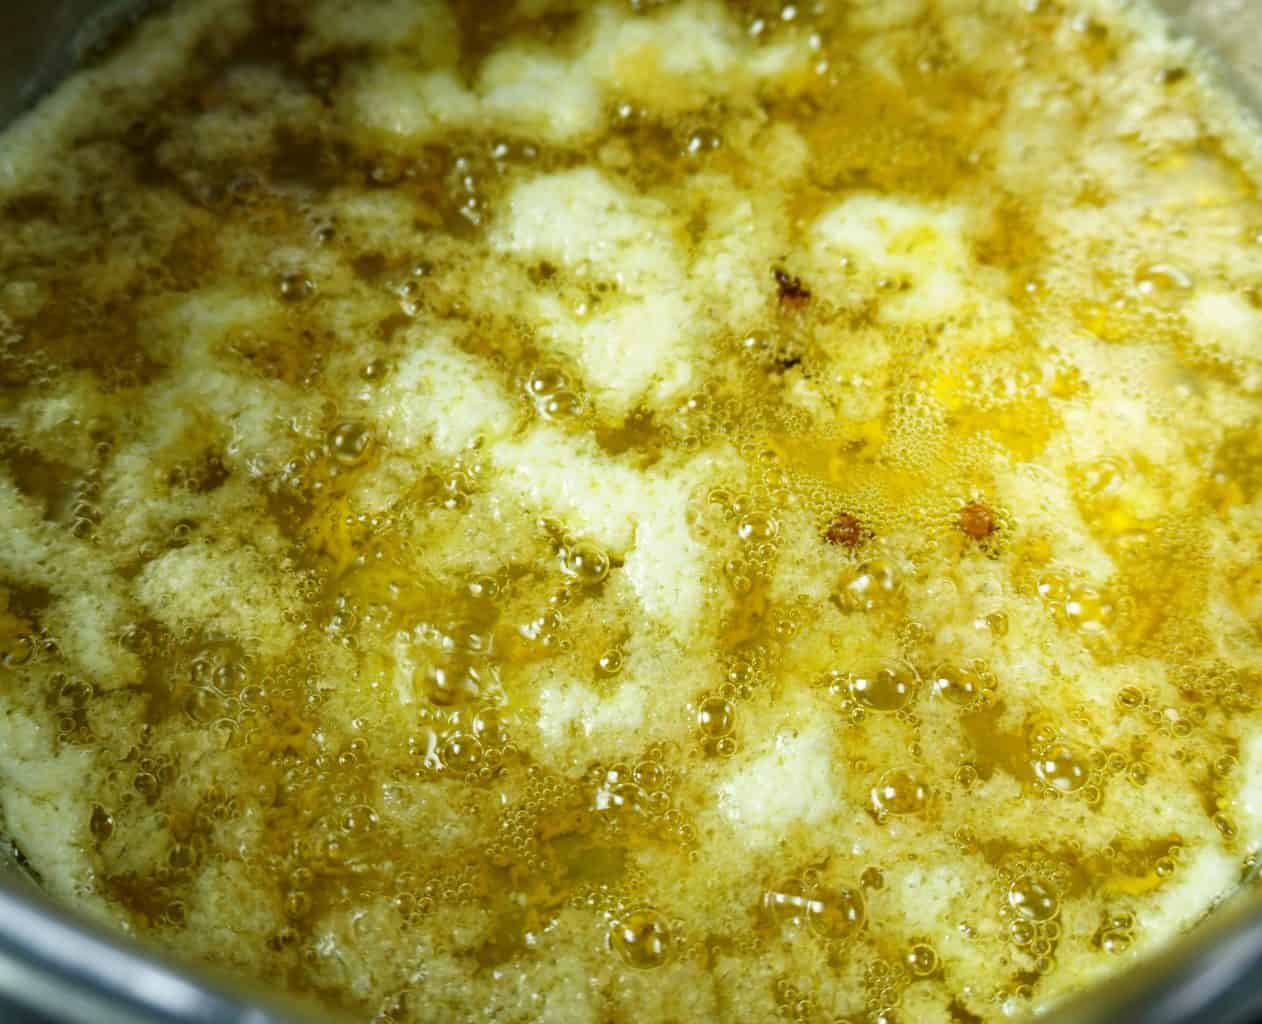
When the bubbles get larger switch off the ghee and set it aside. Keep the finished ghee away from stove, because the heat from the stove will still continue cooking the ghee and the heat may burn the ghee.
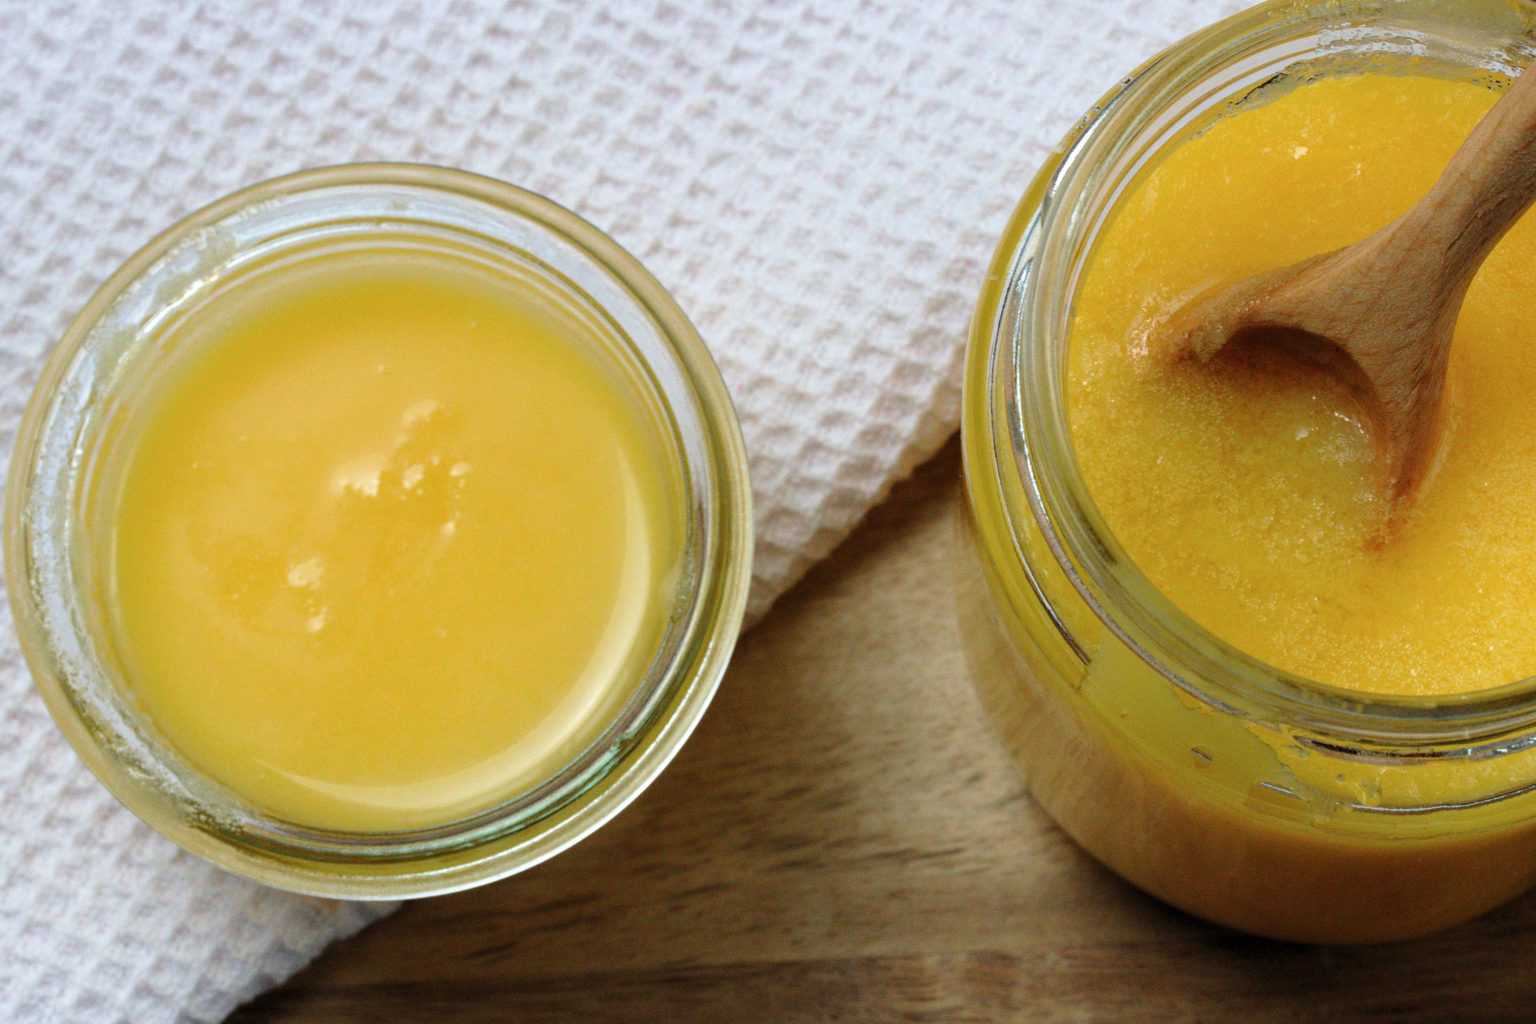
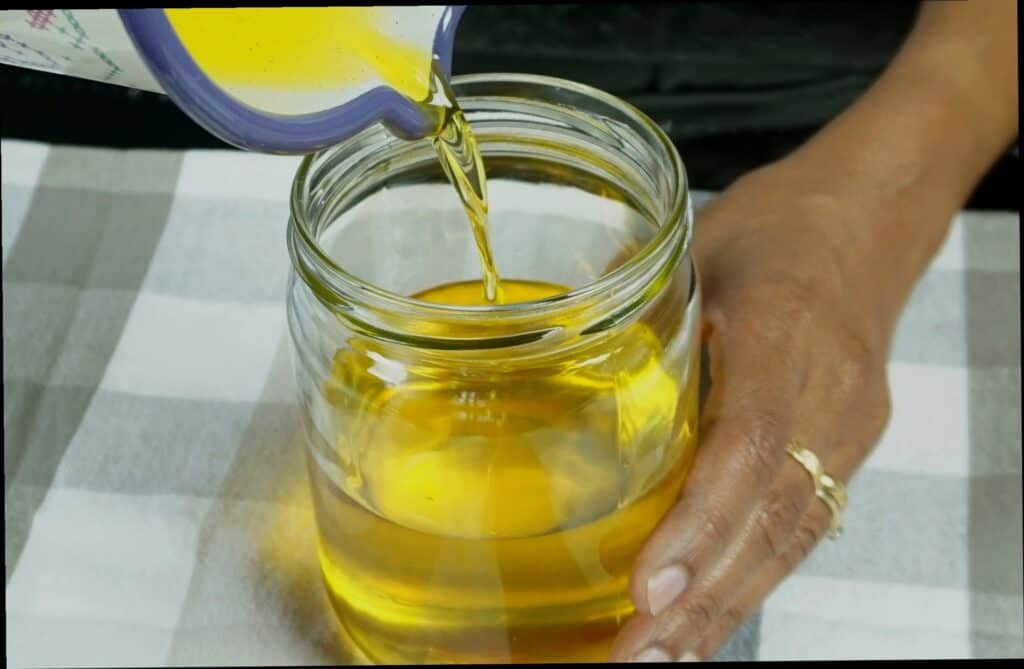
Filter the ghee using a thin muslin cloth. Usually the milk solids will settle down, but a few small particles could be floating on top. Just to be sure you don’t have any, its best to filter the finished ghee. Fill the filtered ghee into dry glass jars and close tightly.
TIP
To check if all the water has evaporated, my mother used to add a big crystal of salt. This salt would remain at the bottom of the pot, which gives a clear indication that the ghee is ready.
Some people in India also add fresh Moringa leaves. The leaves will splutter when the ghee is done, this is an indication to switch off from the flame and set it aside.
HOW LONG CAN YOU STORE GHEE ?
Ghee has a long shelf life. I usually store ghee at room temperature for 6 months or more because, I usually make big batches. I cook with ghee almost always, especially if I cook Indian food. Therefore making many bottles comes handy and saves energy and washing up.
SHOULD I REFRIGERATE GHEE ?
Ghee doesn’t need to be refrigerated. Remember we have removed all the moisture from the butter during the cooking process. What we are now left with, is pure fat which doesn’t need refrigeration.
CAN I USE GHEE FOR DEEP FRYING ?
Yes, Ghee has a very high smoking point up to 250 deg centigrade. Ghee contains an abundance of medium-chain fatty acids. Therefore, ghee can withstand high heat cooking whereas other oils would break down and become toxic. Because of the above reasons, ghee is ideal for deep frying. I usually make a lot of Indian sweets with pure ghee. Some of the sweets are deep fried, therefore ghee is my ideal choice of fat for frying. Plus the sweets made with ghee taste great.
Your feedback is valuable
Have some feedback you’d like to share? Leave a note in the comment section below!
Thank you so much for visiting Vial Fair Living – we’re so happy you’re here! and thanks for taking the time to read this post. I would love it, if you can share this recipe using the social media buttons you see next to the post and give this recipe a 5 Star rating.
Links which you might like to read for more information on ghee
PIN IT FOR LATER


Ingredients
- 500 gm of raw milk butter
- 3 to 4 cloves
Instructions
- Melt butter in a heavy bottom pot on medium to low heat. Don't use a high flame because you can burn the butter and the ghee will smell burnt. Medium to low heat is preferable to get a nice flavor.
- As the butter melts, you will see that the butter will start foaming once it starts to melt. This is the first foaming stage.
- Continue heating in the same heat. The water in the butter will start evaporating as well. Be prepared for a few splashes and mess on your stove top.The white foam are the milk solids.
- If you are making ghee in the traditional way, leave the foam (milk solids) undisturbed. On the other hand if you want to scoop out the foam you can do so. Personally, for me this method is too much of a botheration, so I don't do it.
- Continue heating and you will see the butter will start clarifying further.
- Once the milk solids start to settle down, the clarified butter undergoes a second foaming stage. The milk solids after settling down will start clarifying, the clarified butter will start to boil gently.
- When the butter has almost finished clarifying, larger bubbles will start to form. You will smell the nutty aroma of ghee soon. At this stage I usually add a couple of cloves for extra flavor, this is optional of course.
- When the bubbles get larger switch off the ghee and set it aside. Keep the finished ghee away from stove, because the heat from the stove will still continue cooking the ghee and the heat may burn the ghee.
- Filter the ghee using a thin muslin cloth. Usually the milk solids will settle down, but a few small particles could be floating on top. Just to be sure you don't have any, its best to filter the finished ghee.
- Fill the filtered ghee into dry glass jars and close tightly.
3 comments
Hi Chitra ! Lovely to enjoy kitchen time with you! Greetings from Luzern! Hilary
Thanks Hilary. Hope we can meet soon. Will get in touch.
Keep up the fantastic work!