Top 3 benefits of grinding your own flour at home
Although I am not a medical expert, yet who can debate the benefits of home ground flour. My journey started with the purchase of my Hawos Oktagon grain mill. I posted a Hawos Oktagon stone mill Tutorial in my previous blog post. In this blog post I will be touching on the Top 3 benefits of grinding your own flour at home. I will also be giving a few tips on storing grains optimally and then a recipe to bake your own bread from freshly ground flour.
Hawos Oktagon 1 would probably be one of the top most kitchen essentials at the Swiss Kitchen. I have been using this mill mainly to grind my own flour for breads, cakes and cookies. Since I am not a medical practitioner, I will not be swearing on the health benefits in this post. Despite it, I would like to list the 3 top benefits of grinding your own flour according to me and many other experts.

One: Taste Benefits of Home ground flour
The first benefit for me in grinding our own flour is for the nutty taste of freshly ground flour.

The nutty taste of the flour mainly comes from the wheat germ. The wheat germ is rich in B vitamins, important antioxidants, vitamin E and polyunsaturated fatty acids. With the commercially ground flours, the grains are subjected to a lot of pressure, heat, and some additives to ensure the quality and the shelf life of the flour. As soon as a grain is cracked and exposed to air, the oils inside of the bran will begin to oxidize and the flour goes rancid very quickly.
When you grind your own flour it retains all of those nutrients and it’s always fresh. The taste and smell of freshly ground flour is something you will come to appreciate. Once you get used to this you will turn your back on commercially ground flours.
Second : Nutritional benefits of Fiber from grinding own flour

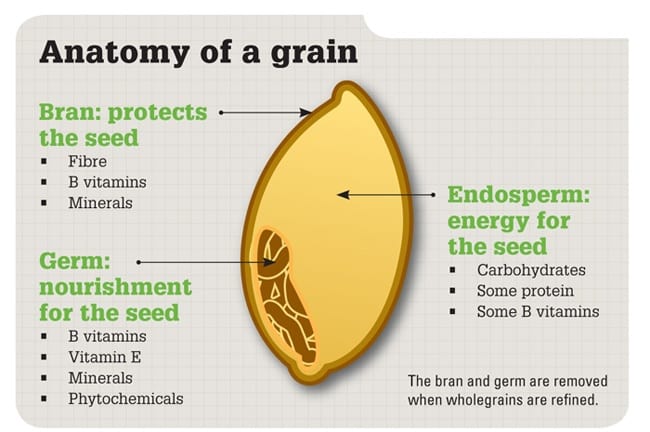
When I mill my own flour I know I get the nutritional value of the complete grain. This includes the bran which contains the largest amount of insoluble fiber, magnesium, riboflavin, thiamine, niacin, iron, and zinc. The germ (or seed) is an excellent source of vitamins B1, B2, B3, E, magnesium, iron, zinc, phosphorous, and polyunsaturated fatty acids. ( Refer to the diagram above)
The endosperm (middle layer) contains mostly protein and carbohydrates along with small amounts of B vitamins, iron and soluble fiber.
With the advent of industrial milling in the late 1800’s, the bran and germ are removed resulting in the use of solely the endosperm. As a result we have what we know as the all-purpose white flour. This flour is devoid of all these beneficial nutrients and hence we consume mainly starch. We all are aware of the important role fiber plays for our gut and digestion.
We see the result of this empty starch with the rise in obesity, type 2 diabetes, stroke and heart disease. ( The Whole Grains Council )
The upside of this stripped down, lifeless version of flour is the shelf life. Because this can survive several months on end for the benefit of long distance transport and probably an even longer supermarket storage.
The downside of this white flour is that we have lost the important insoluble fiber and minerals, a combination essential for proper digestion and nourishment.
Three – Cost Benefits of milling your own flour
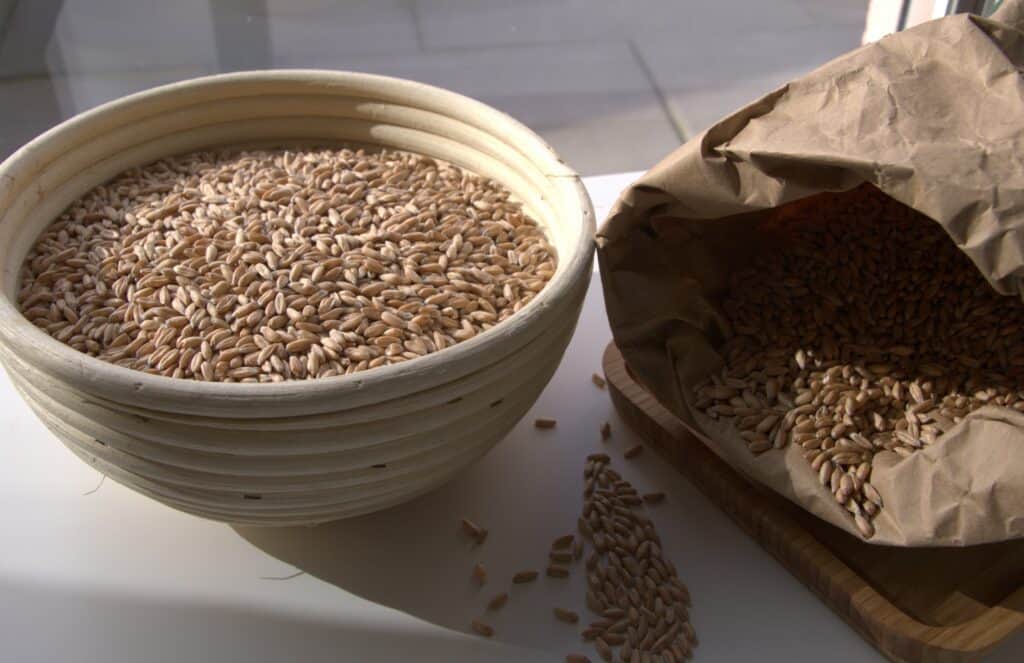
One of the many noteworthy benefits is the savings you get by grinding your own flour. Grains are a lot cheaper than ready store bought flour. Let me compare the price of spelt grains in Switzerland. Spelt grains in Switzerland in a health food store costs roughly between 6 to 7 CHF. This is a very high quality Demeter grain from Bio dynamic agriculture. The same spelt flour of Demeter quality costs around 10 CHF.
I also usually buy in bulk which adds to the additional savings. Buying in bulk also saves me frequent trips to the super market. Saves me time and petrol. Since we usually buy in health food stores we can also order in bulk 5 or 10 kg at a time which comes a lot cheaper than the conventional 1 Kg bags common to supermarkets. (waste reduction also sorted)
So there is definitely a saving in terms of cost there which eventually pays off for the mill. The cost of the mill initially is a big investment. But in the long run it pays off in terms of savings got from buying grains. Furthermore, one must not forget the nutritional benefits of having freshly ground flour.
If you store your grains well they can last many years. According to some preppers even more than 3 years.
Benefits of grinding your own flour: Longer shelf life of grains

I usually store the grains in the paper bag I buy them with, in my cellar. Our cellar is usually around 10 degrees cooler than the rest of our home, therefore, I have have had no problems with bugs or any moths. We also have a relatively dry cellar. There are 3 ways which I know will make your grains last longer.
- Add in dry turmeric roots or dried Neem leaves.
- You can also mix in some bay leaves.
- Freeze the grains for about a week if you have a big freezer. Then store them in air tight containers. By freezing you will kill all the larvae and the bugs if there are any.
How long to store your freshly milled flour?
Its best to use up freshly ground flour immediately after milling. According to some sources wheat flour loses 40% of its vitamin content in the first 24 hours after milling and 85-90% after 2-3 more days. Nutritional characteristics of Organic fresh stone ground breads.
- At room temperature: Less than 2 days, but some sources say up to 5 days would be okay. If your flour is already “soaking” in a recipe, don’t worry about rancidity. Other processes have already begun. An example would be sour dough starter.
- In the refrigerator: 10 days
- In the freezer: up to 30 days.
- This very comprehensive source set the standard for flour storage at 15-60 days, but they also admit rancidity has been found as early as two days after milling.
Personally, I grind only as much as needed. Because if left in the fridge or freezer one tends to forget about them.
You can buy this mill in the links below
Disclosure: This post contains affiliate links, meaning, at no additional cost to you, we will earn a small commission if you click through and make a purchase. Learn more
To conclude this post, I am linking the tutorial to grind Hawos Oktagon 1 grain mill. The next process would be to bake a spelt bread from this freshly ground own flour. Scroll down for the recipe below.
Where I source my Wheat Berries in Europe
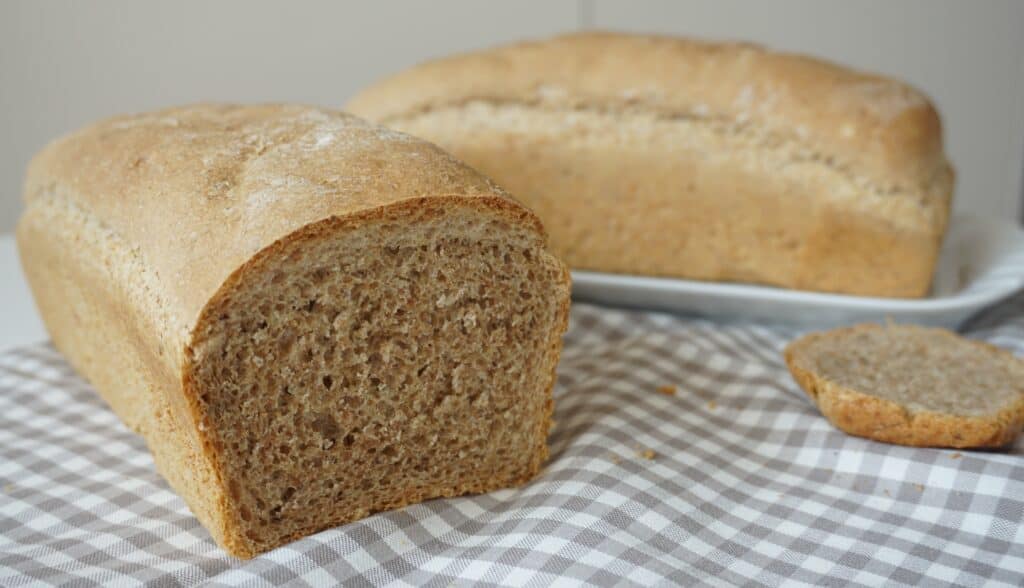
Mix all the ingredients and take care to keep the salt to one side. While adding the yeast mixture make sure it doesn’t touch the salt. Salt will kill the yeast and the bread will not rise well. Knead well by adding water as its mixing and till all the flour is well incorporated to the dough and leaves the sides of the mixing bowl. Be careful not to add too much water. Cover and let it rise. When the dough has risen to double the volume, sprinkle flour to your work surface. And grease a loaf pan. Preheat you oven to 250 deg Celsius. The loaf pan ensures an even rise and bake. The pan also prevents the bread from cracking at the sides.
Ingredients
Instructions
Knead again to incorporate all the air pockets to have a well risen shaped dough.
Shape the dough by rolling it tightly and place into the loaf pan and cover. Set it aside to rise for 15- 20 min.
Bake on the highest heat for about 12 min to develop a dark crust then turn down the heat to 180 deg Celsius and bake for 35 min.
Cool the bread before serving.
PIN IT FOR LATER


2 comments
can you use pearl spelt to grin into flour with mockmill
Yes, you can. If it is able to grind grains why not. If it is able to grind wheat then spelt is easy. Wheat is harder than spelt.