
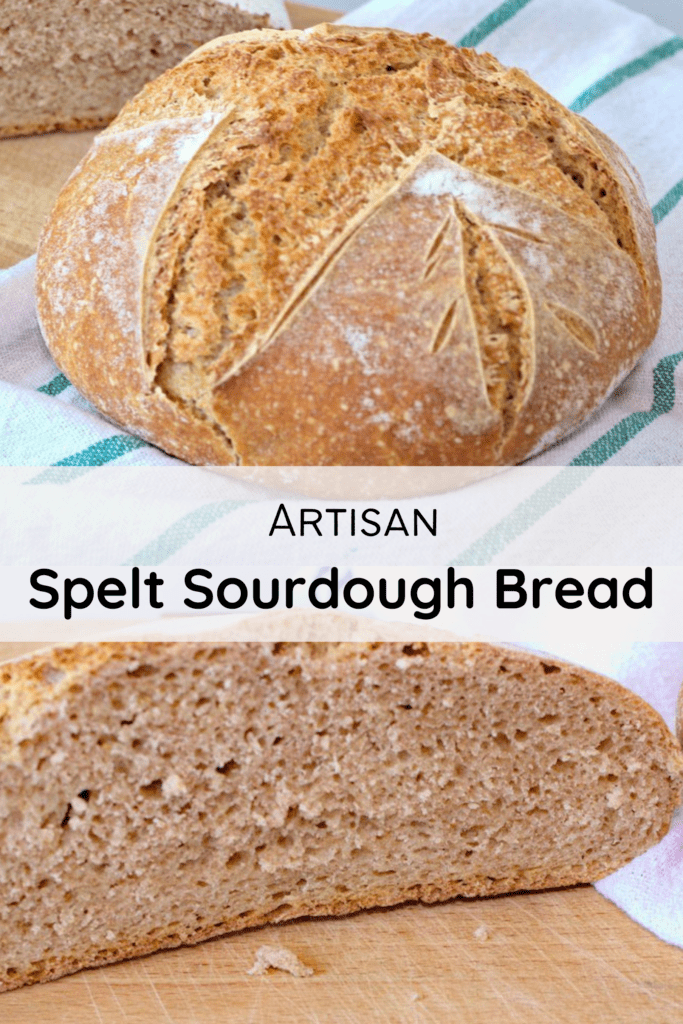
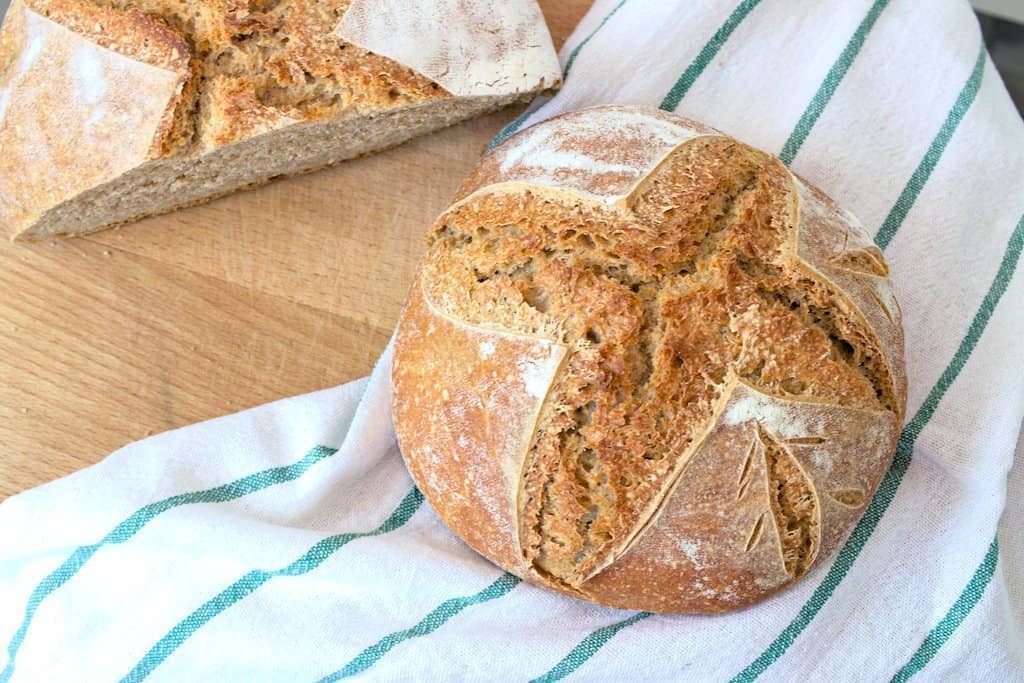
The smell of freshly baked bread is what permeates our kitchen most days in our home. Especially that of an artisan sourdough bread baked with spelt in a cast iron dutch oven. Sourdough bread is the pinnacle of bread baking. Follow this recipe for an easy to bake crusty artisan sourdough bread that is great to serve anytime of day.
The best artisan sourdough bread has a deep tangy flavour with an lovely crust and a chewy texture inside. This kind of bread makes it perfect for breakfast, soups and salads. I have been baking different kinds of breads in a dutch oven for over 2 decades and my family just loves it.
You may think that creating an artisan bread is complicated and therefore it will require a lot of expertise. But actually, its not that difficult to create this bread if you follow these simple steps while proving and baking. You may need some small little extras to create this professional looking bread made with your own hands.
I promise you, that the extra effort you put into this bread is worth it. Because after you master this art, you will never go back to buying breads from the supermarket. I would be lying if I said I never buy bread from the bakery. Yes, I do buy bread now and then, but its so seldom that I lost track of the times we buy bread.
BENEFITS OF SOURDOUGH
Sourdough has many health benefits. The main reason sourdough has gained popularity is the probiotic benefit of long fermentation which helps in boosting digestion and gut health. Moreover, it adds to better nutrient absorption in addition to promoting gut health.
People with gluten sensitivity can easily digest sourdough bread. Because the anti-nutrients present in grains like phytic acid breaks down during the fermentation making it easily digestible. The fermentation helps to lower the gluten in the grains and its rich in probiotics too.
These are some of the benefits of sourdough breads. Take a look at this site to know more about the health benefits of sourdough.
WHAT IS ARTISAN BREAD
Actually there is no hard and fast rules for this variety of bread. Artisan usually refers to fresh and small batches of bread uniquely crafted using natural ingredients and traditional methods. Generally, artisan bread is fresh bread that is crusty and rustic looking. Some of the artisan bakers make great art work on the bread. Best left to the skills of the professional and not for a beginner. First to master the technique of bread baking then we can play with the designs.
TIPS FOR MAKING ARTISAN SOURDOUGH BREAD
- Set aside at least 12 to 15 hours to make the bread from start to finish.
- Unless you are making sourdough recipes regularly, store the starter in the fridge. If your sourdough starter is in the fridge like mine, then keep it at room temperature for about 30 minutes.
- Feed the starter atleast twice before taking a portion for your recipe.
- The starter should be like a thick batter. When you feed the batter, stir in about 100g of finely ground flour and add just enough water to keep it in the same consistency.
- To check if the starter is ready for baking, take a small portion of the dough and drop it in water. If the dough floats then the bread is ready for baking.
- Sourdough breads generally don’t need too much water while kneading.
- If you are using a low gluten flour, be careful while adding water, add little at a time.
- Cast Iron dutch oven is great for baking breads, they can retain the heat and moisture and give that crispy crust.

Disclosure: This post contains affiliate links, meaning, at no additional cost to you, we will earn a small commission if you click through and make a purchase. Learn more
TOOLS YOU MAY NEED
Ingredients
- 150 grams of sourdough starter
- 500 grams of freshly ground flour ( I used spelt )
- 10 gms of himalaya salt
- 10 gms of brown sugar
- Oil for oiling
- a little extra flour and semolina for shaping and dusting
- Water as needed
METHOD
Stage 1: Mixing and proving the dough
- Combine the sourdough starter, water, sugar and salt in a large mixing bowl or stand mixer.
- Add water as needed and knead until the dough starts pulling away from the sides of the bowl. Knead until smooth and elastic, about five minutes with stand mixer.
- To check if the dough is right, take a little and strech it, it should be translucent and elastic.
- When the dough feels smooth and silky, cover in a well oiled bowl and leave the dough to rise for a minimum of about 8 to 12 hours. I usually use a large Tupperware bowl with an airtight lid. The dough remains moist and rises well. You can use a cling wrap and cover the bowl.
Stage 2: Shaping the Bread dough
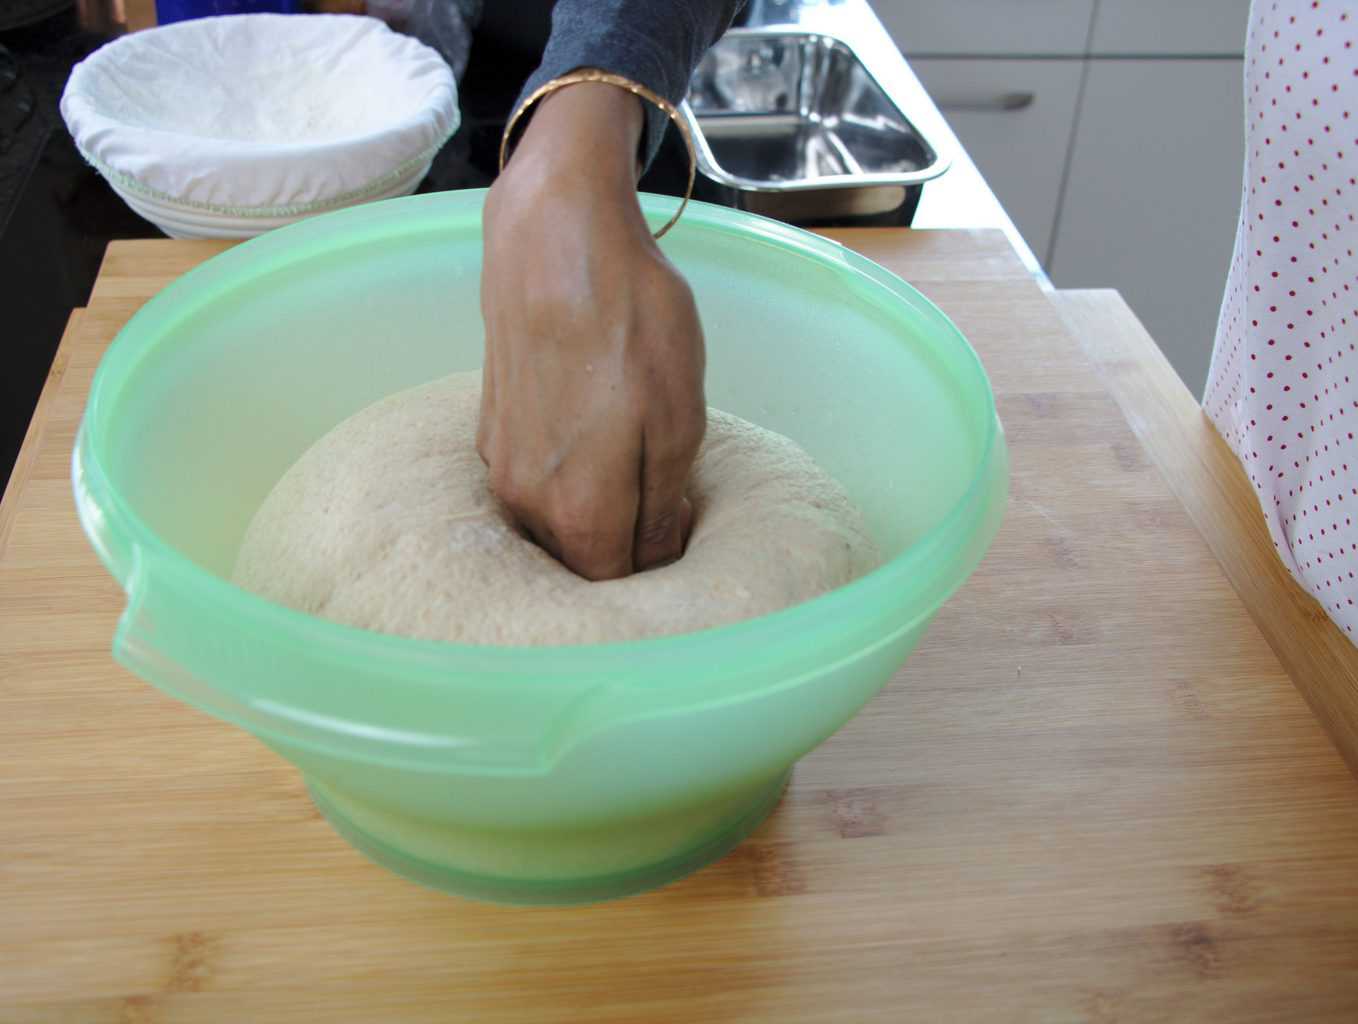
5. Once the dough has doubled in size, punch it down to see if the dough springs back.
6. Dust a wooden surface with a mixture of flour and semolina and tip the risen dough onto the surface.
7. Push the dough down with your knuckles and the heels of your hand and knock out the air. Fold the dough in on itself several times because this strengthens the structure of the dough.
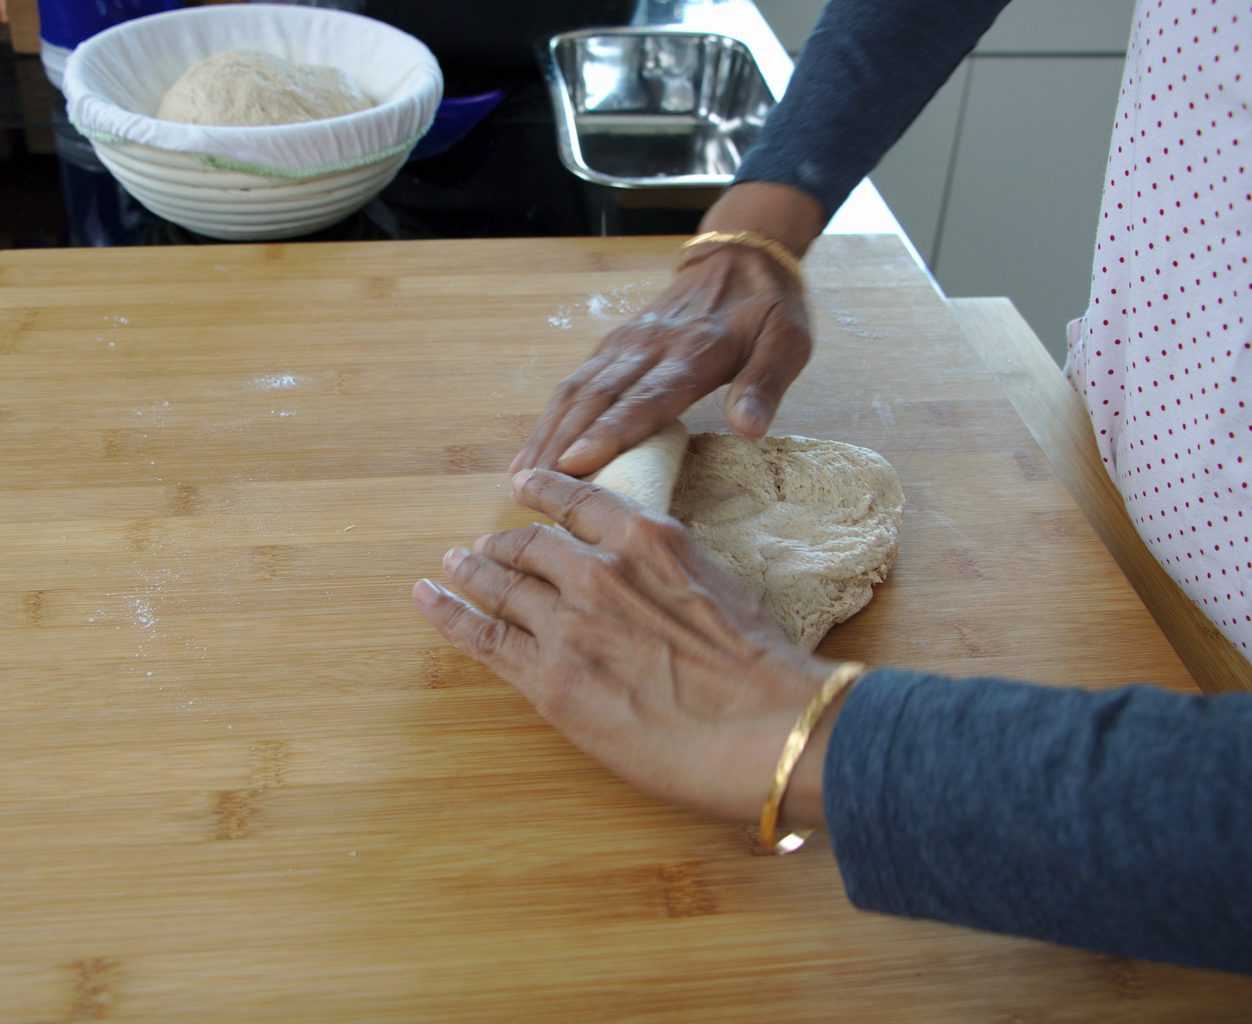
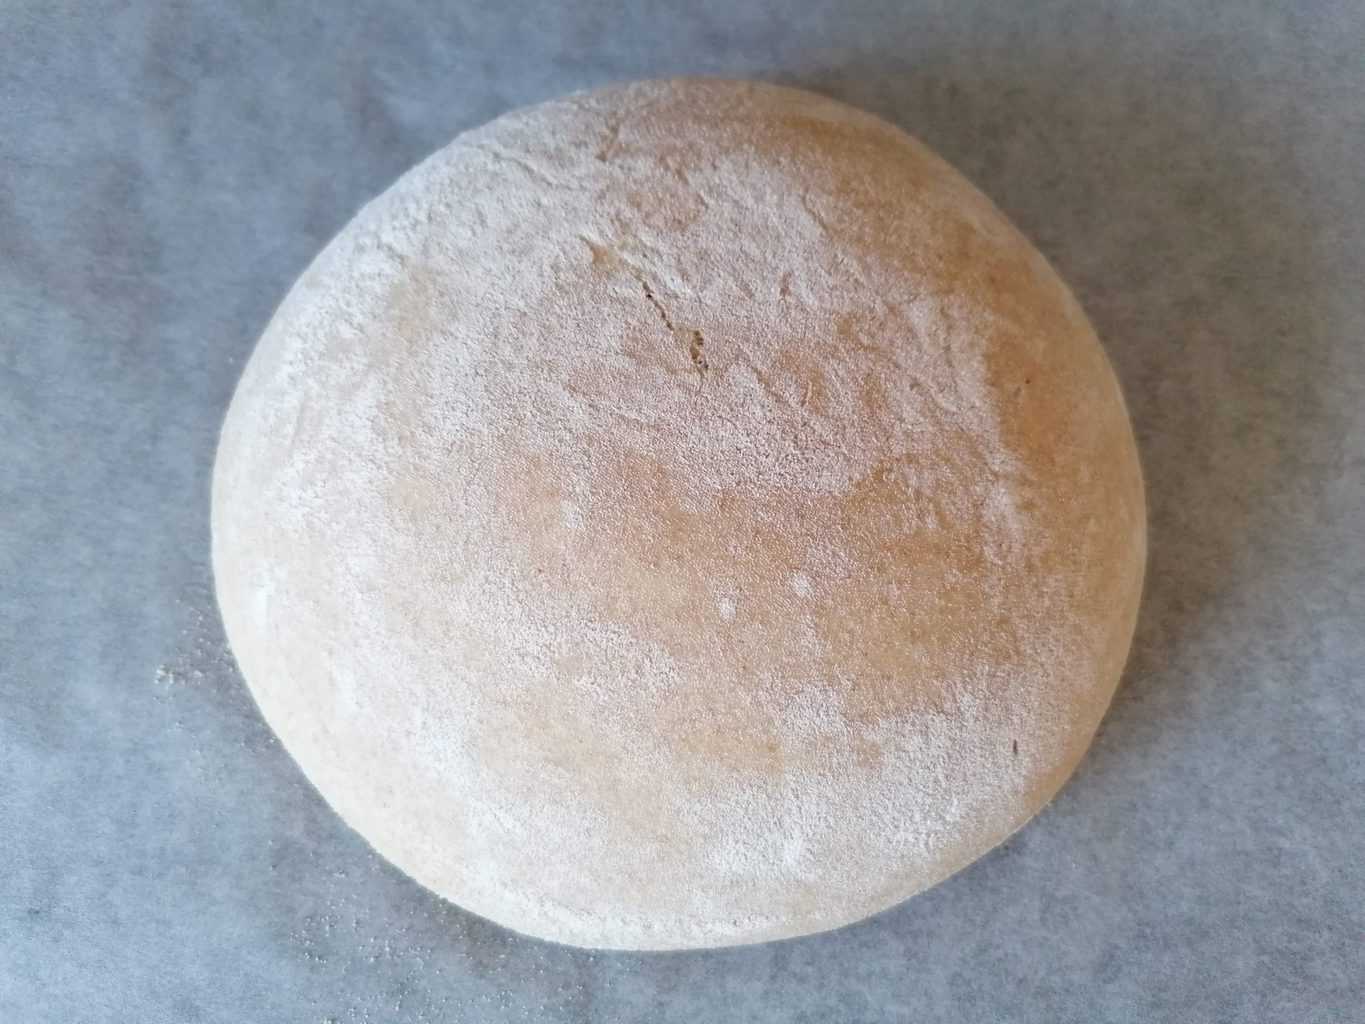
8. Flatten the dough into a rough rectangle and shape then fold the dough into a rough ball by folding it under. Cup it with your hands and turn it round and round tucking the dough in slightly underneath pulling it in to create a ball that is smooth.
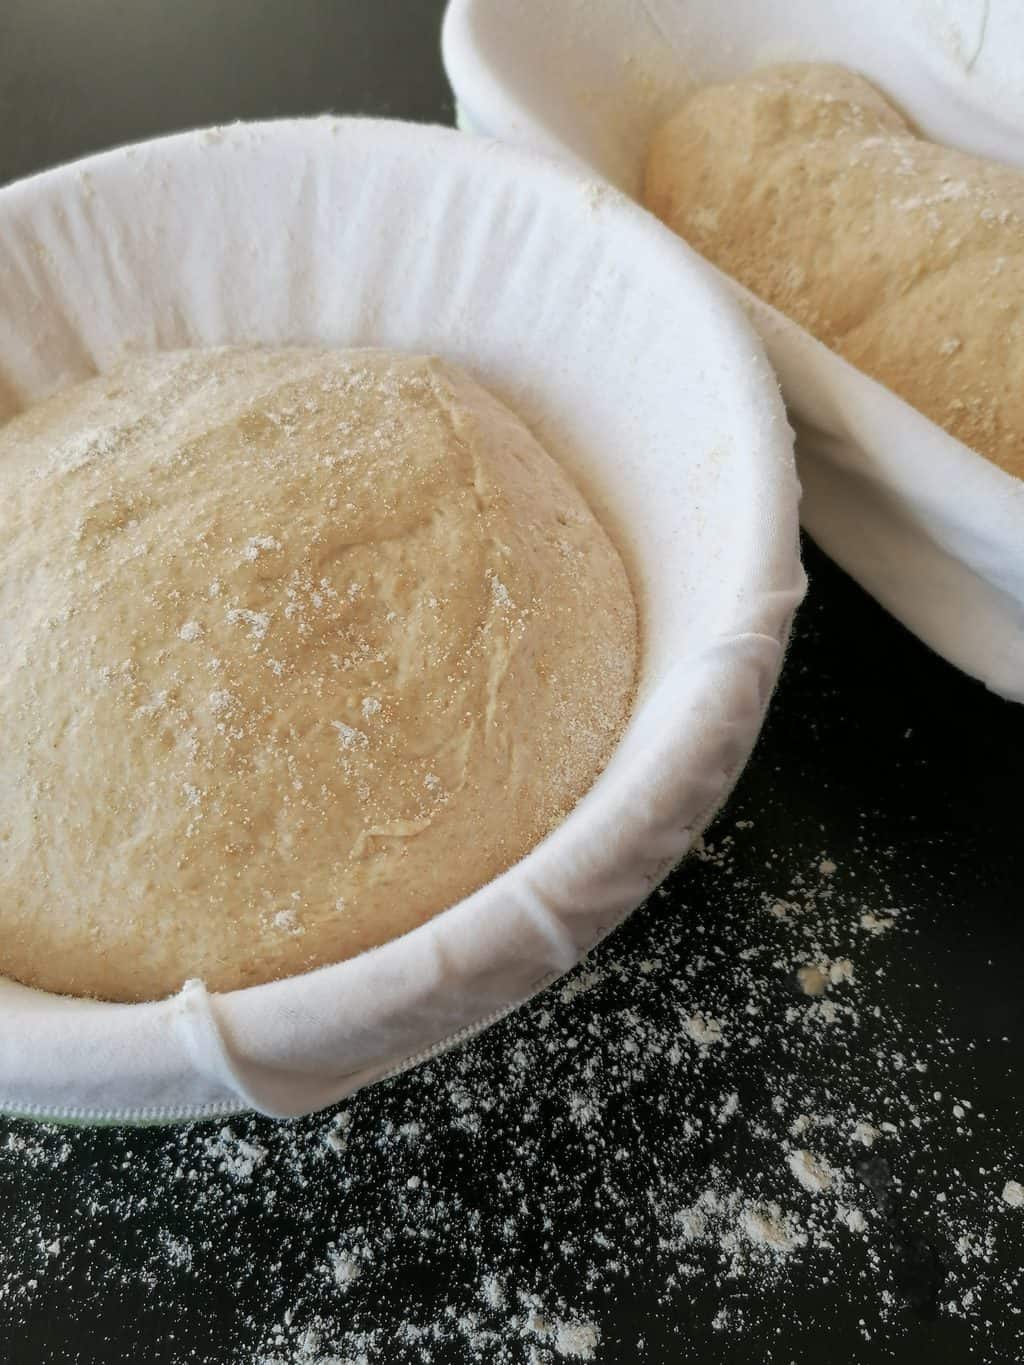
9. Dust you banneton basket with flour and semolina. If you are using a lining then dust the liner and place the shaped dough in it.
10. Cover the dough with a large plastic bag, so that there is enough space for the bread to rise and it won’t touch the plastic.
Don’t use a cling wrap because once the bread rises, it will stick to the wrap and it will be difficult to maintain the shape while transferrring. I have a special elastic wrap for this purpose that I use again and again.
11. Leave the dough to rise for another 2 to 4 hours, depending on the room temperature.
Stage 3: Baking your Artisan Sourdough Bread
12. Heat the cast iron dutch oven with the lid to the maximum temperature your oven allows. I have a special bread function in my oven, therefore the maximum I can heat is 230 deg. centigrade.
13. Transfer the risen dough into a baking parchment just before baking.
14. Sprinkle a little flour and score the bread and score the bread, I usually just cross it or leave it like that.
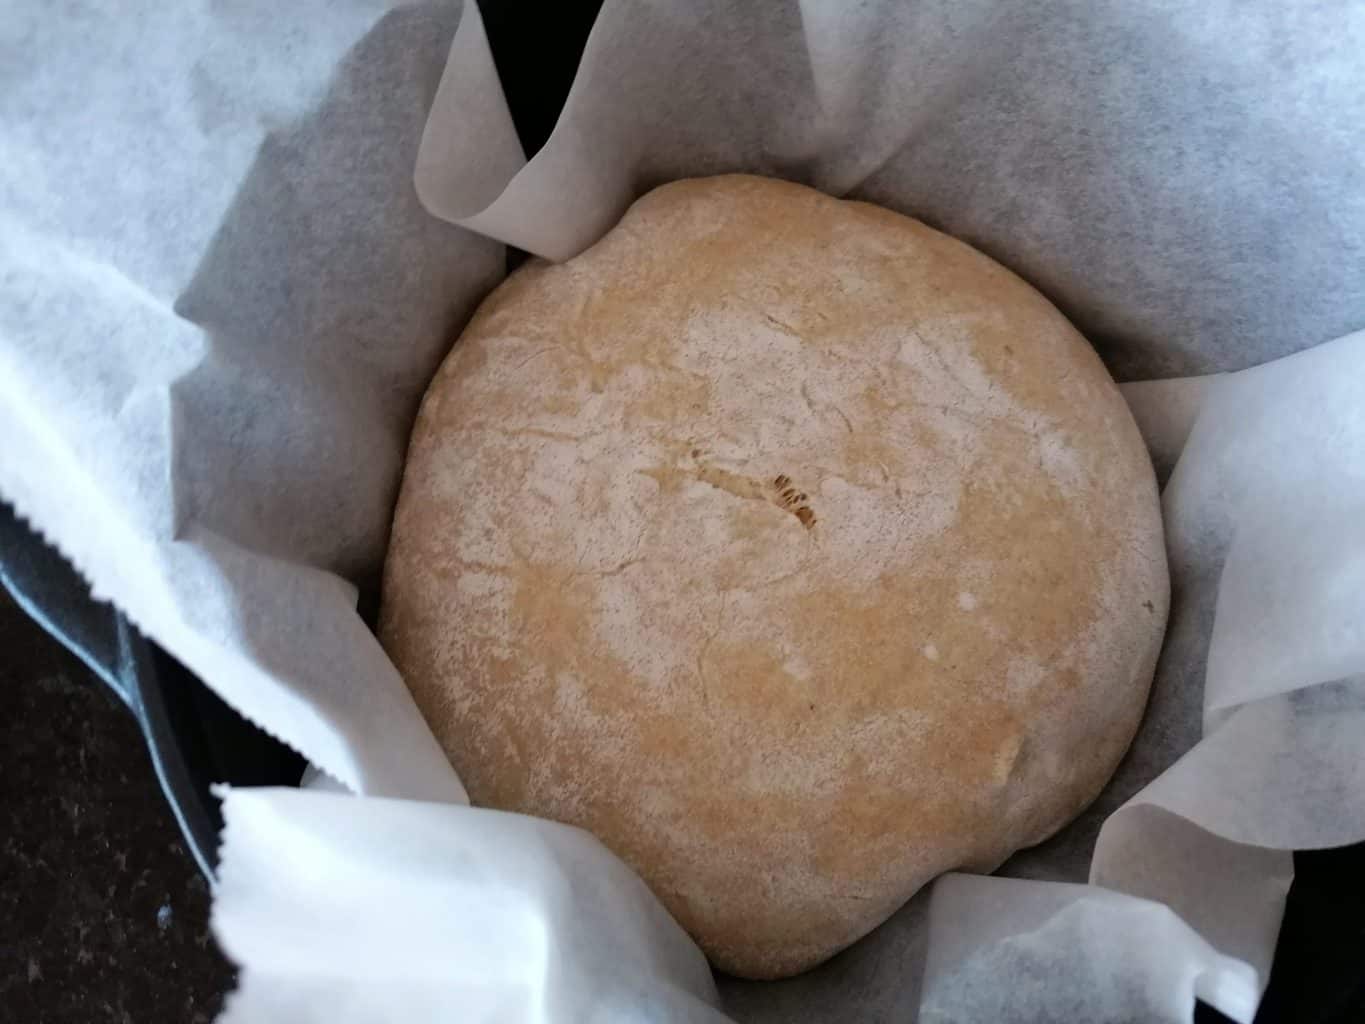
15. Gently place the shaped dough with the baking parchment into the dutch oven and bake with the lid closed for 20 minutes.
16. After 20 minutes reduce the heat to 190 deg. centigrade and remove the lid and bake for a further of 20 to 25 min.
17. Remove and place on a wire rack to cool. Slice and serve.
How long can you store the Artisan Sourdough bread ?
Homemade bread lasts easily for atleast 3 to 4 days in a good bread box at room temperature. The bread retains its moisture if the bread is not stored in the fridge. You can freeze the bread, thaw and warm shortly before eating.
Since its fermented from whole grains, I noticed that these breads keep fresh longer at room temperature. The crust from a dutch oven baked bread also helps in sealing the moisture.
Your feedback is valuable
Did you like Easy Artisan Sourdough Bread? Leave me a comment, I’d really love to know! Also Tag me on Instagram @swisshomegardenofficial
Have some feedback you’d like to share? Leave a note in the comment section below!
Thank you so much for visiting Vial Fair Living – we’re so happy you’re here! and thanks for taking the time to read this post. I would love it if you can share this recipe using the social media buttons you see next to the post and give this recipe a 5 Star rating.

Ingredients
Instructions