
Last summer I ended up with more fresh cherries from our harvest than we could possibly eat. So, instead of letting them go to waste, I decided to make this easy homemade cherry jam recipe. What started as a simple afternoon project quickly became one of my favorite recipes of the season.
A Sweet Taste of Summer in every Jar
There’s something incredibly satisfying about turning fresh fruit into jars of deep ruby-red jam. The smell of simmering cherries filled the whole kitchen, and by the end of the day I had several beautiful jars cooling on the counter — each one tasting like summer. I have shared a lot of jam recipes previously in this site and all from our garden harvest, so why not this one too. As our garden produces, more preserves come into my repertoire.
Although, I took these photos during that batch last year, every time I look at them I can almost smell the sweet cherries again. Soon we will be harvesting our abundance, so before I get into the thick of jam making, I wanted to share this recipe with you.
If you’ve never made homemade jam before, this is a wonderful place to start.
Why You’ll Love This Cherry Jam
- Made with simple ingredients
- No complicated equipment needed
- Sweet, rich cherry flavor
- Perfect for toast, pastries, yogurt, and desserts
- A beautiful way to preserve summer fruit
Homemade Cherry Jam Recipe Ingredients
- 1 kg fresh cherries, pitted
- 500–700 g pectin sugar (depending on how sweet your cherries are)
- 2 tablespoons lemon juice (juice of one big lemon)
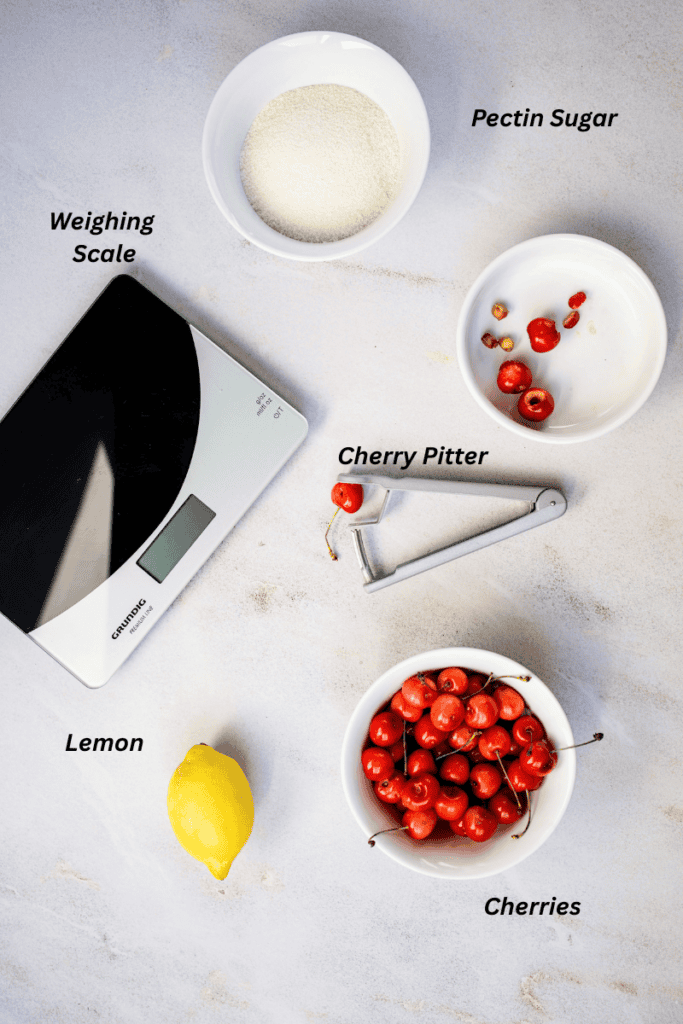
Tools needed to make Homemade Cherry Jam
Disclosure: This post contains affiliate links, meaning, at no additional cost to you, we will earn a small commission if you click through and make a purchase. Learn more
Silicone Canning Jar Lifter and Funnel
Homemade Cherry Jam Recipe Method

Step 1: Prepare the Cherries
Wash and pit the cherries, then roughly chop them if you prefer a smoother jam texture. On the other hand you can use a food mill which will do the job too. I do a mix of both and add some larger pieces for a more rustic feel.
Step 2: Combine the Ingredients
Add the cherries, sugar, and lemon juice to a large heavy-bottomed pot. Stir everything together and let it sit for about 10–15 minutes so the cherries can release some of their juices.
Step 3: Cook the Jam
Place the pot over medium heat and bring the mixture to a gentle boil. Stir frequently to prevent sticking.
As the jam cooks, you’ll notice the cherries soften and the color deepen into a rich dark red. If foam forms on the surface, skim it off with a spoon.
Step 4: Let It Thicken
Continue simmering for about 25–40 minutes, stirring occasionally. The exact cooking time depends on how juicy the cherries are and how thick you like your jam.
To test if it’s ready, place a small spoonful on a cold plate which has been in the freezer. After a few seconds, gently push it with your finger. If it wrinkles slightly, the jam is done. On the other hand you can drop a little on the plate and tilt it and if the jam stops flowing then its done.
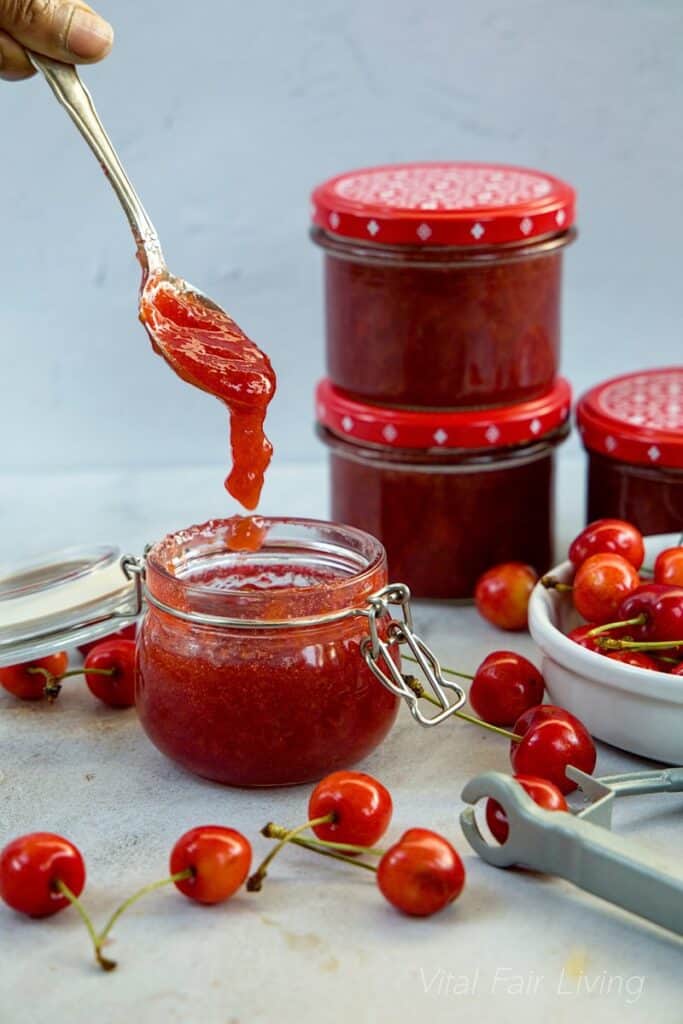
Step 5: Fill the Jars
Carefully pour the hot jam into hot sterilized jars and seal them immediately. While filling, keep the jars on a wooden board or tea towel to prevent them from cracking due to the temperature difference.
Then comes my favorite part — watching the jars cool on the counter while the kitchen still smells like cherries.
How long can you store Homemade Cherry Jam ?
I store all my homemade jams for well over a year in my cool cellar. Once you open the jar refrigerate it and consume quickly. The sugar in it preserves without any problem if you have done the whole process under sterile conditions. The steam when cooled helps in creating a vacuum which will preserve the jam for long. Make sure that the jars seal well.
If you want to you can do a water bath canning for 10 minutes, but its not necessary if you have followed all the procedure properly.
Homemade Cherry Jam Video
Tips for the Best Cherry Jam
- Sweet cherries create a softer, sweeter jam.
- Sour cherries add a brighter, tangier flavor.
- A tiny splash of almond extract pairs beautifully with cherries.
- The jam will continue to thicken as it cools.
- Use a cherry pitter tool to speed the process of pitting individually.
Ways to Enjoy Cherry Jam
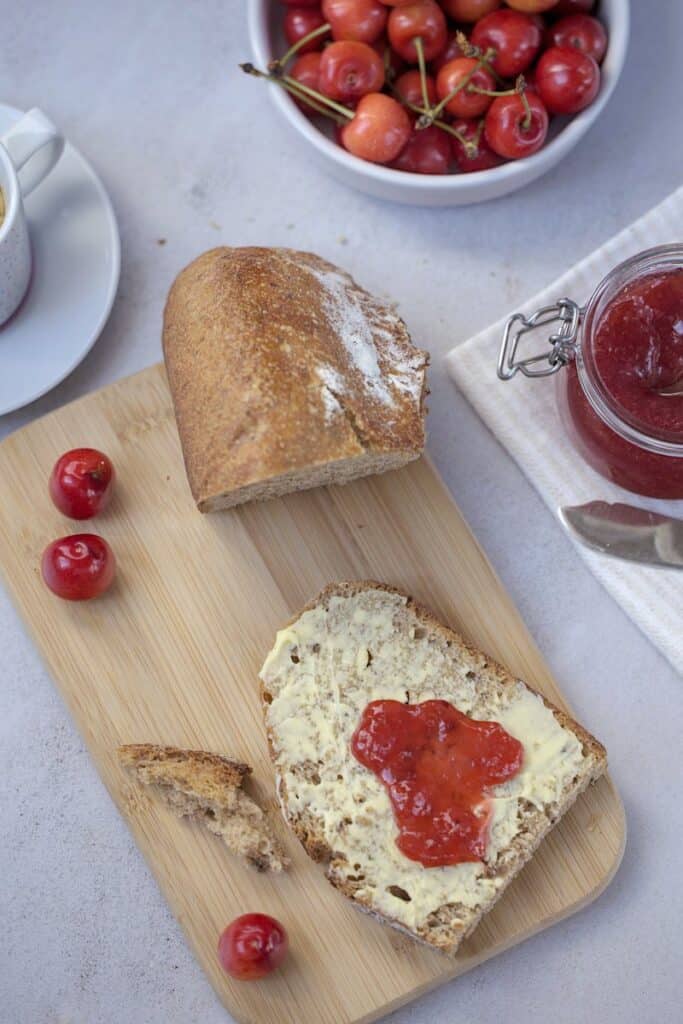
This homemade cherry jam is incredibly versatile. Some of my favorite ways to use it are:
- Spread on homemade Sourdough Bread
- Swirled into Yogurt
- Spoon over pancakes or waffles
- Added to cheesecake or desserts
- Layered into cakes
- Paired with soft cheeses on a snack board
Your feedback is valuable
If you try this recipe and love it, I would love if you come back and gave it 5 stars! Thank you so much for visiting Vial Fair Living – we’re so happy you’re here! I would love it if you can share this recipe using the social media buttons you see next to the post.

If you have a cherry pitting tool, the process is a lot faster. I took almost me an hour to do it by hand.
Ingredients
Instructions
Notes