
There’s something special about baking with wild garlic in spring. Its fresh, delicate flavour pairs perfectly with the deep tang of sourdough, creating a loaf that feels rustic, seasonal, and incredibly satisfying. This wild garlic sourdough bread has a crisp golden crust, an airy crumb, and ribbons of fragrant wild garlic running through every slice.
Whether you forage your own wild garlic or pick some up at a local market, this is the kind of bread that makes your kitchen smell unreal while it bakes.
Wild Garlic Sourdough Bread Recipe Ingredients
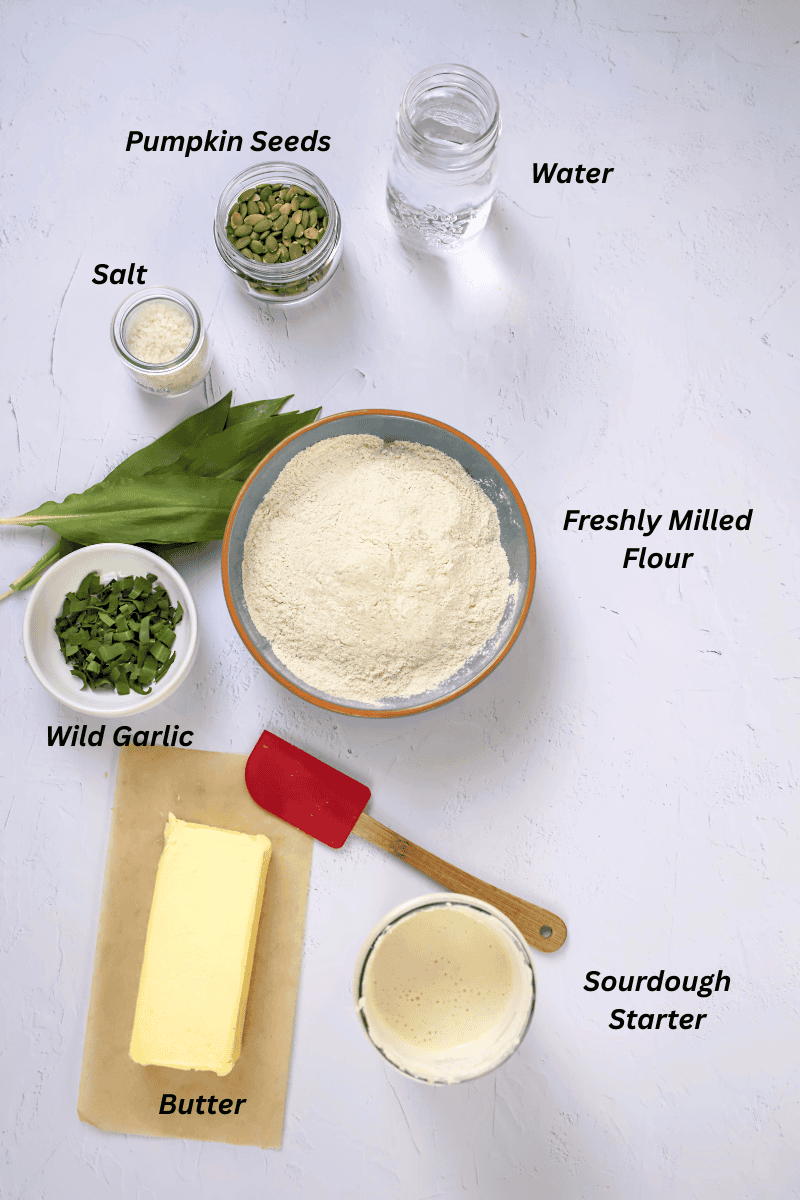
For the dough
- 500 gm strong white bread flour
- (or 350 gm freshly ground spelt and 150 gm all purpose flour)
- 100 gm active sourdough starter
- 10 gm sea salt
- 50 gm Butter
- 40 gm pumpkin seeds
- 250 -300 ml water
- 30 gms of wild garlic leaves cut into small pieces
Tools you will need
Disclosure: This post contains affiliate links, meaning, at no additional cost to you, we will earn a small commission if you click through and make a purchase. Learn more
Stand Mixer
Method


Video Tutorial to Make Wild Garlic Sourdough Bread
Step 1: Mix the Dough
Feed your sourdough starter at least 6 hours before after doing a discard. An active starter is important to get a good rise.
In a large bowl, combine the flour and water until no dry flour remains. Cover and leave to rest for 30 minutes.
This rest period is called autolyse, which helps develop gluten naturally and improves the texture of the sourdough.
Add the sourdough starter and salt, then mix thoroughly until fully incorporated.
Step 2: Stretch and Fold
Over the next 2 hours, perform a series of stretch and folds every 30 minutes.
Each fold strengthens the dough and helps create that open, airy crumb sourdough is known for.
By the final fold, the dough should feel smoother, more elastic, and hold its shape better.
Alternatively, you can use your Kitchenaid mixer. I tend to use my mixer for most of my mixing and folding.
Step 3: Prepare the Wild Garlic

Finely chop the wild garlic leaves and mix with the butter or olive oil, plus a pinch of salt.
The aroma is fresh, green, and intensely garlicky without being overpowering. Soak the pumpkin seeds too. When you soak the pumpkin seeds, its easier to incorporate into the dough. On the other hand, you remove the phytic acid by soaking, another health benefit good for your gut.
Step 4: Laminate the Dough
Once bulk fermentation is underway, gently stretch the dough out on a lightly oiled work surface into a large rectangle.
Spread the wild garlic mixture and the soaked pumpkin seeds evenly across the surface. On the other hand you can add the wild garlic and pumpkin seeds while doing the stretch and fold. Alternately, you can add the butter, wild garlic leaves and the soaked pumpkin seeds after the autolyse process.
Fold the dough back over itself, layering the wild garlic throughout the dough.
This technique distributes the filling without tearing the gluten structure.
Step 5: Bulk Fermentation
Leave the dough to rise until slightly puffy and aerated. Depending on room temperature, this may take another 6 hours. I like to do the bulk fermentation at room temperature. A lot depends on the temperature of your home. During the colder months it will take a little longer.
Look for:
- bubbles forming under the surface
- increased volume
- a soft, pillowy texture
Step 6: Shape the Loaf
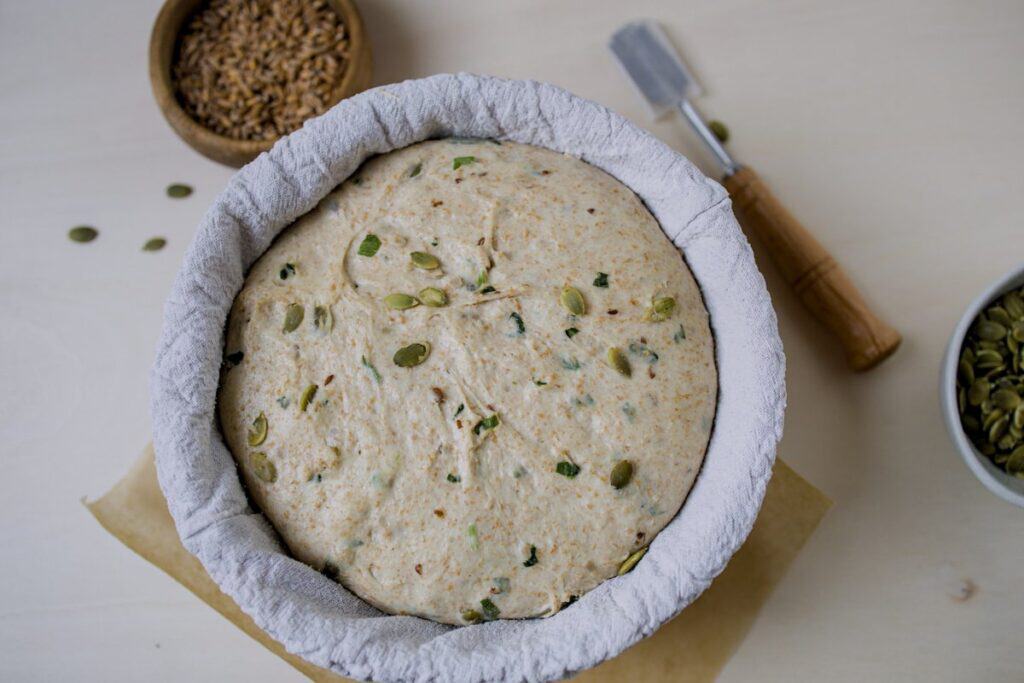
Turn the dough onto a lightly floured surface and shape into a tight round or oval loaf.
Place seam side up into a floured banneton or bowl lined with a floured tea towel.
Cover and refrigerate overnight for a slow cold proof. If you want to use a plastic bag for this you can do so. But of late, I just cover it with a moist tea towel so that the bread doesn’t dry up.
This overnight fermentation develops flavor and improves the crust.
Step 7: Bake
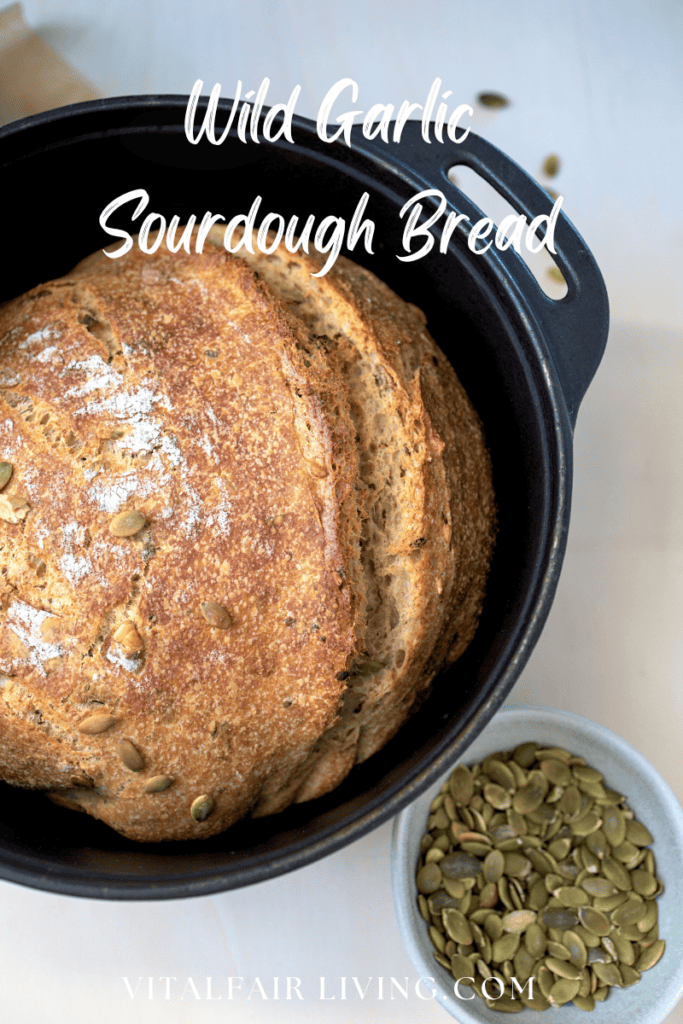
Preheat your oven and Dutch oven to 250°C
Turn the dough onto baking paper, score the top with a sharp blade, and bake:
- 25 minutes covered
- 20–25 minutes uncovered at 190°C
The loaf should emerge deeply golden with blistered crust edges and fragrant wild garlic throughout.
What Does Wild Garlic Taste Like?
Wild garlic has a milder, fresher flavour than regular garlic. It tastes slightly grassy, herbal, and sweet, making it perfect for spring baking.
When baked into sourdough, it becomes mellow and aromatic rather than sharp.
Can Your Freeze Sourdough Bread?
Yes, you can freeze sourdough bread. The best way to freeze boule is by slicing and then freezing in a tray before transferring to ziploc bags. Check out my post on How to Store Bread
Tips for Wild Garlic Sourdough Bread
- Use an active starter that doubles predictably before baking.
- Wild garlic contains moisture, so avoid overfilling the dough.
- Cold proofing overnight improves both flavour and scoring.
- For extra flavour, add grated Parmesan or Gruyere during lamination.
- If you are using freshly milled flour, reduce water. I used Spelt flour, since its low in gluten and therefore needs less water.
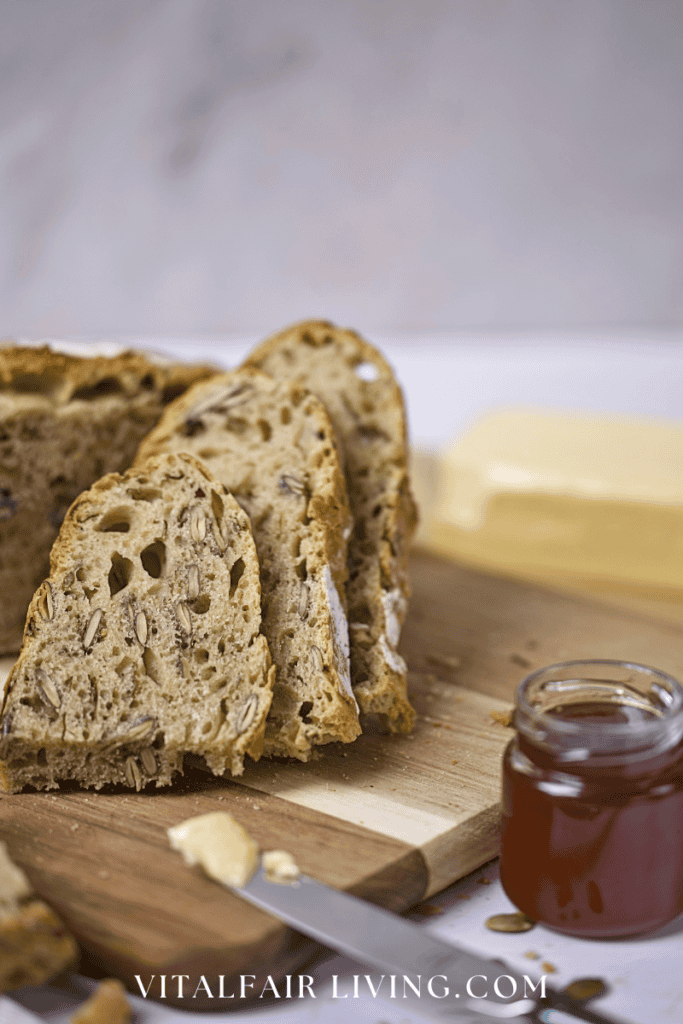
Serving Suggestions for Wild Garlic Sourdough Bread
This bread tastes great with
- toasted with salted butter
- alongside soup
- with soft cheeses
- dipped into olive oil
- served with spring salads
It also makes great grilled cheese sandwiches.
Wild garlic sourdough is one of those seasonal bakes that feels both rustic and luxurious at the same time. The chewy crumb, crisp crust, and pockets of fragrant wild garlic make every slice feel special.
Your feedback is valuable
If you try this recipe and love it, I would love if you come back and gave it 5 stars! Thank you so much for visiting Vial Fair Living – we’re so happy you’re here! I would love it if you can share this recipe using the social media buttons you see next to the post.
If you are using freshly milled flour, reduce water. I used Spelt flour, since its low in gluten and therefore needs less water.
Ingredients
Instructions
Notes
2 comments
Your bread feels like a celebration of nature, patience, and nourishment all in one loaf. Truly inspiring to see food made with so much soul and connection to the earth.
Thanks.